Setting up a new device to be autoprovisioned
Step 1:
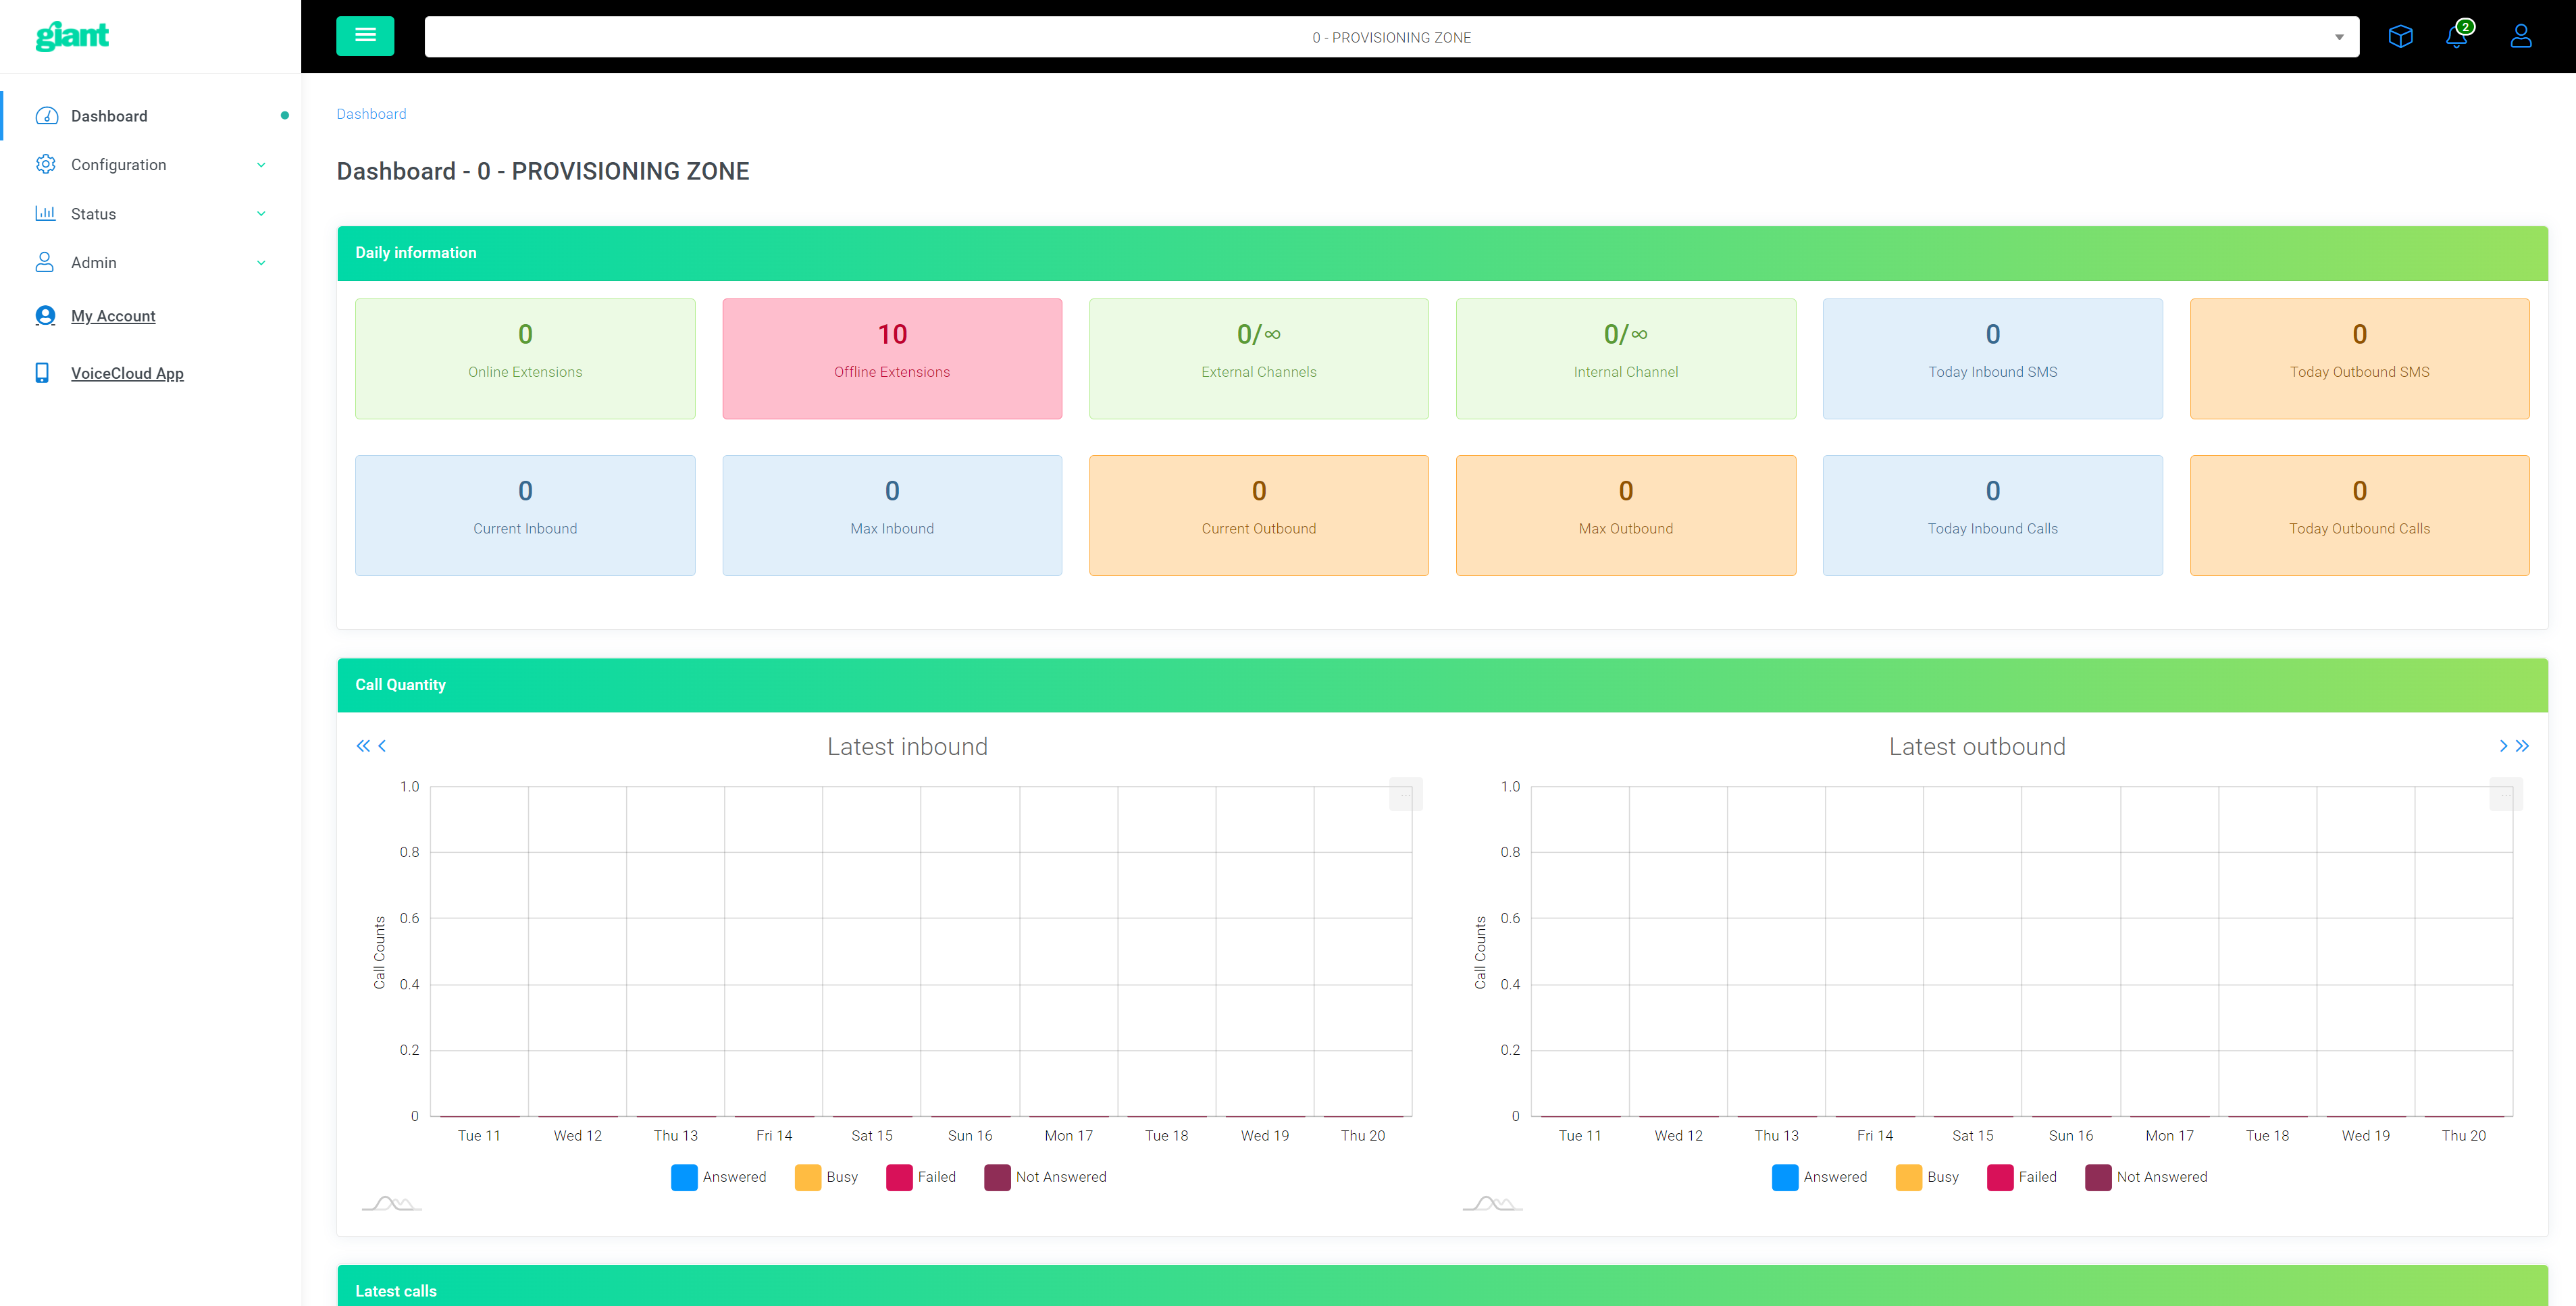
From your main PBX dashboard screen, navigate to Configuration > Provisioning > Phones.
Step 2:
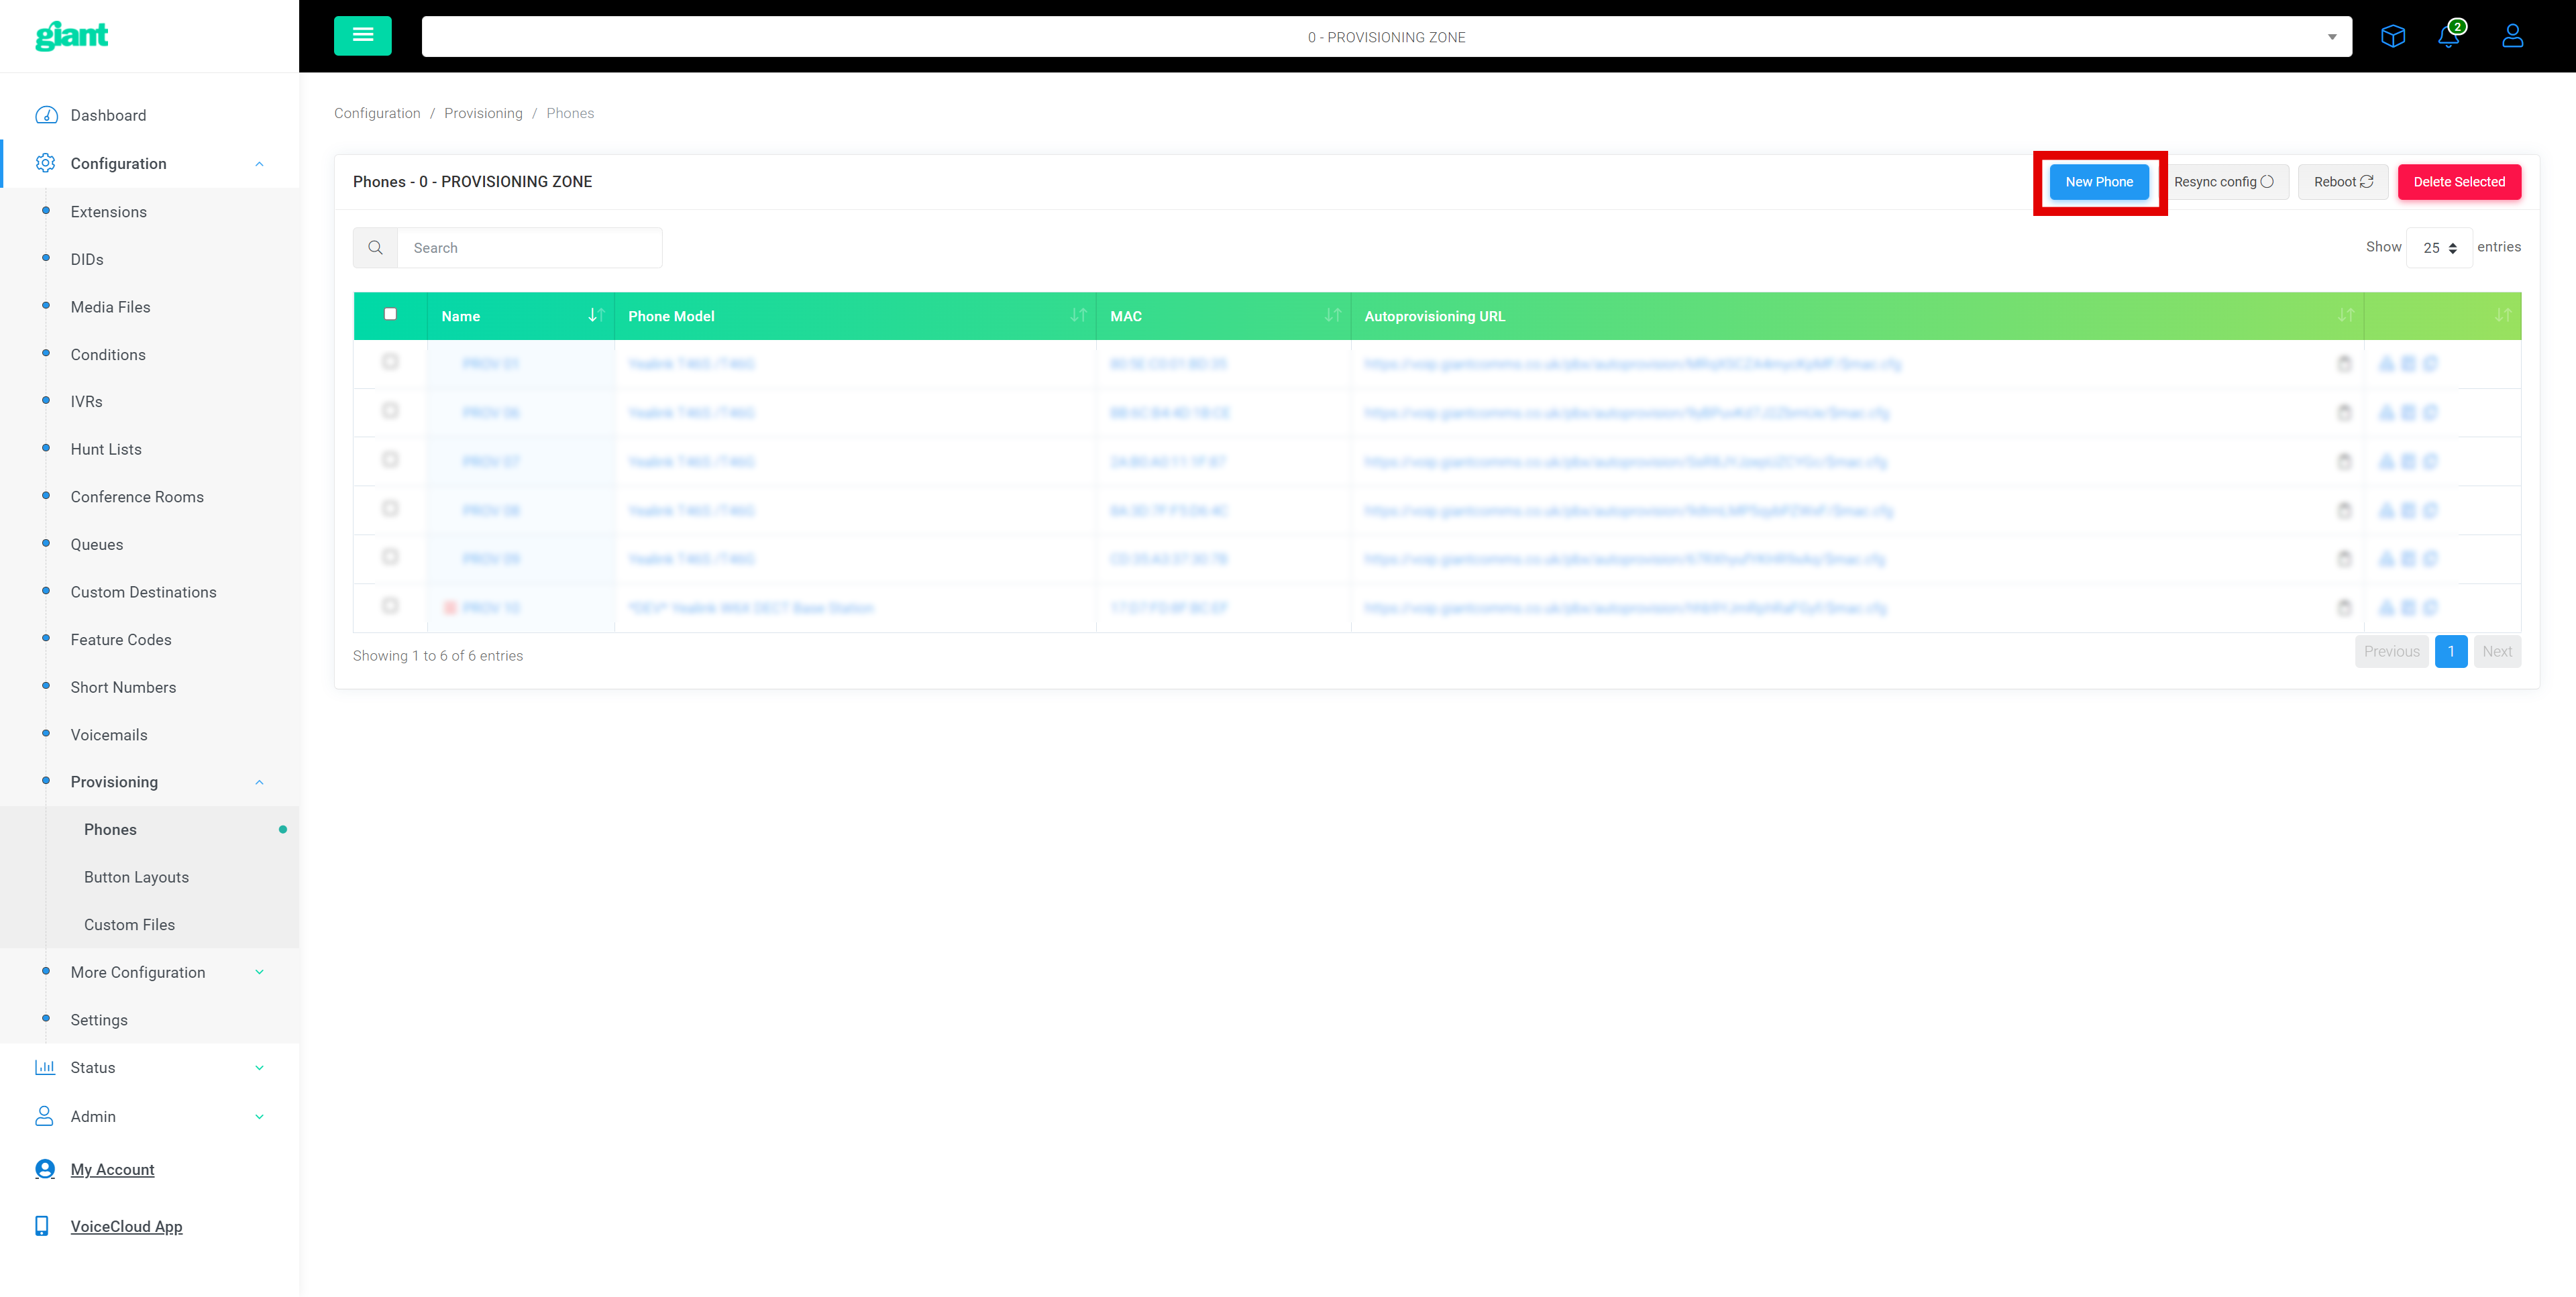
To create a new Zoiper phone autoprovision link, click 'New Phone' in the top right corner of the phones data table.
Step 3:
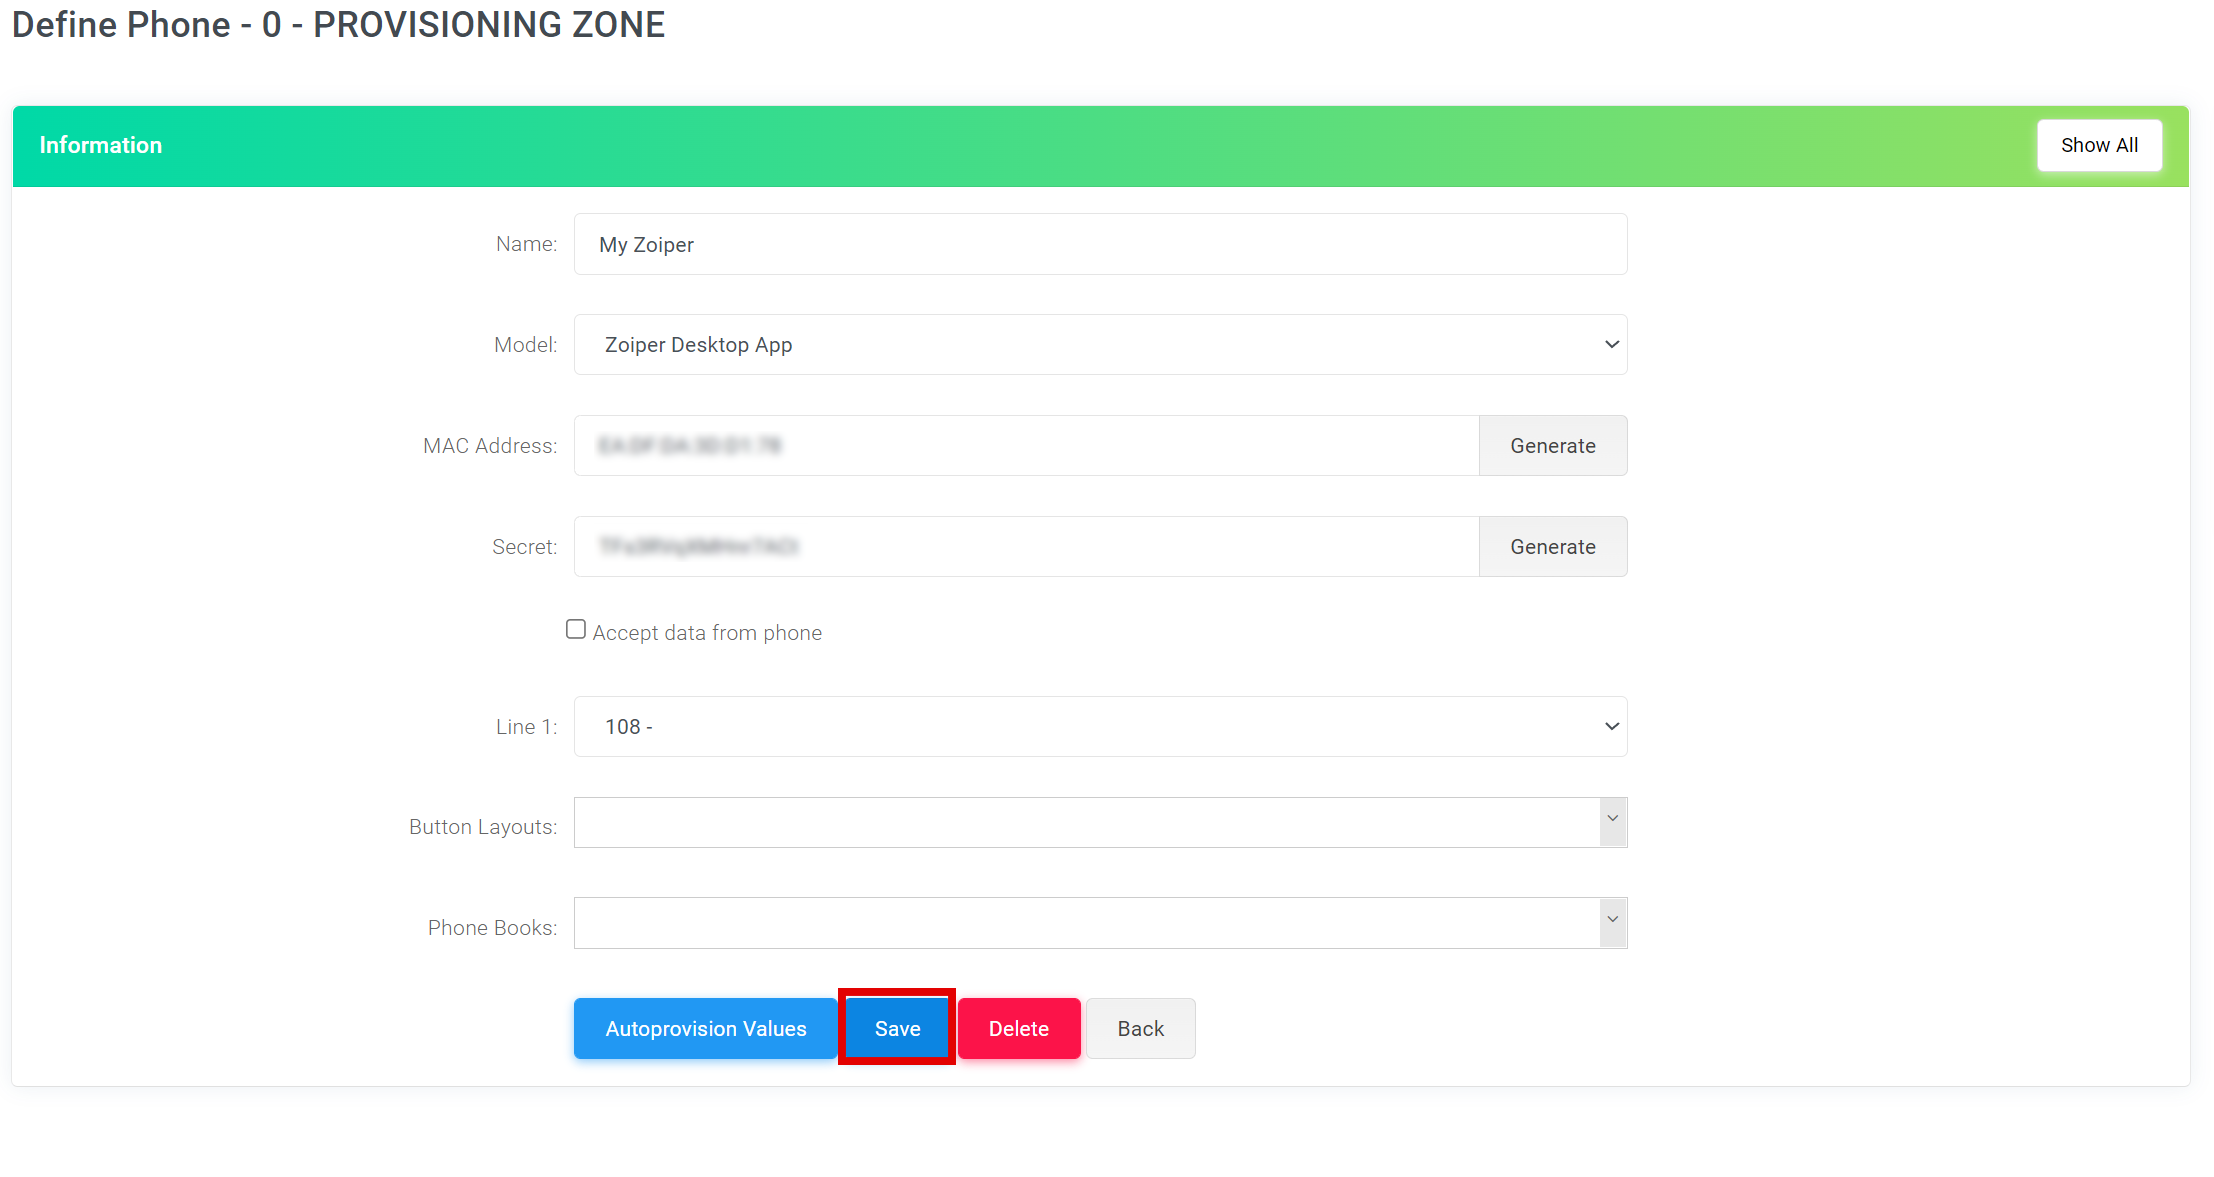
Next you will be presented with the new phone configuration screen, you are able to set up autoprovisioning files for different hardware and SIP clients, since we want to set up a Zoiper auto-install link, we will follow the steps below to do so.
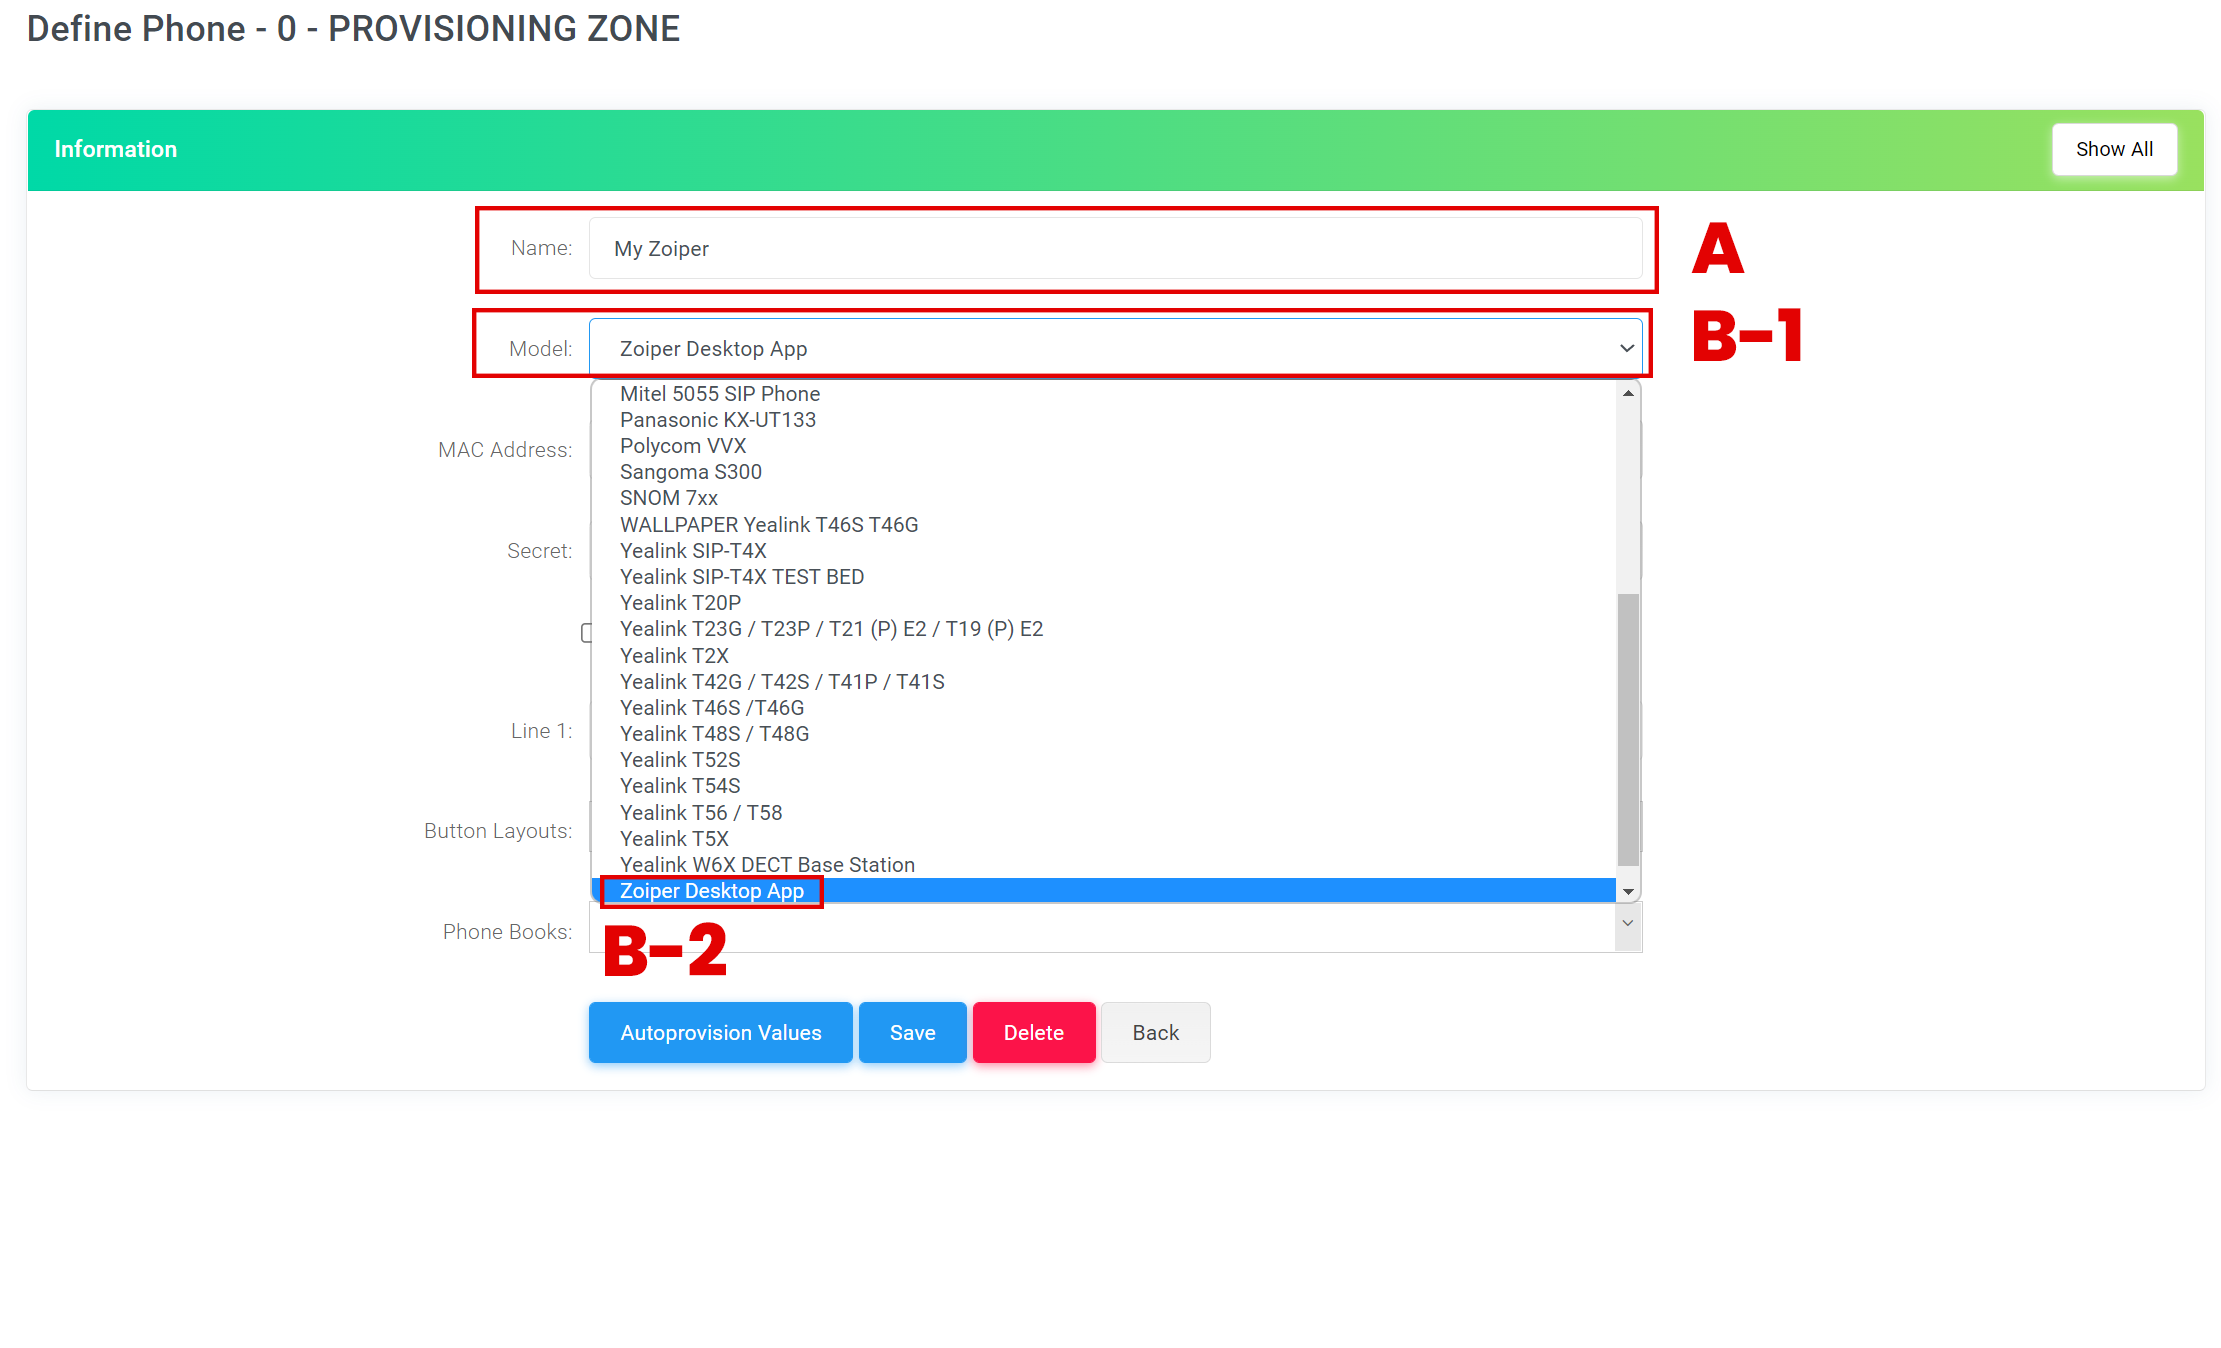
A: We can enter a name for this device to make things easier to troubleshoot, fault find this will define it in the 'phones' configuration page UI.
B-1: Clicking the dropdown named 'Model' we can choose from a range of pre-configured provisioning file templates, we will select 'Zoiper Mobile App' here (Labelled 'B-2' in the above screenshot).
CRUCIAL: Lastly we need to click the 'Generate' button beside the 'MAC Address' field and assign a random MAC ADDRESS for this installation.
Step 4:
Next we need to select which 'Extension' is to be used for auto-registration this assigns the extension credentials to the Zoiper client automatically. We do this by clicking the 'Line 1' dropdown and confirming our selection.
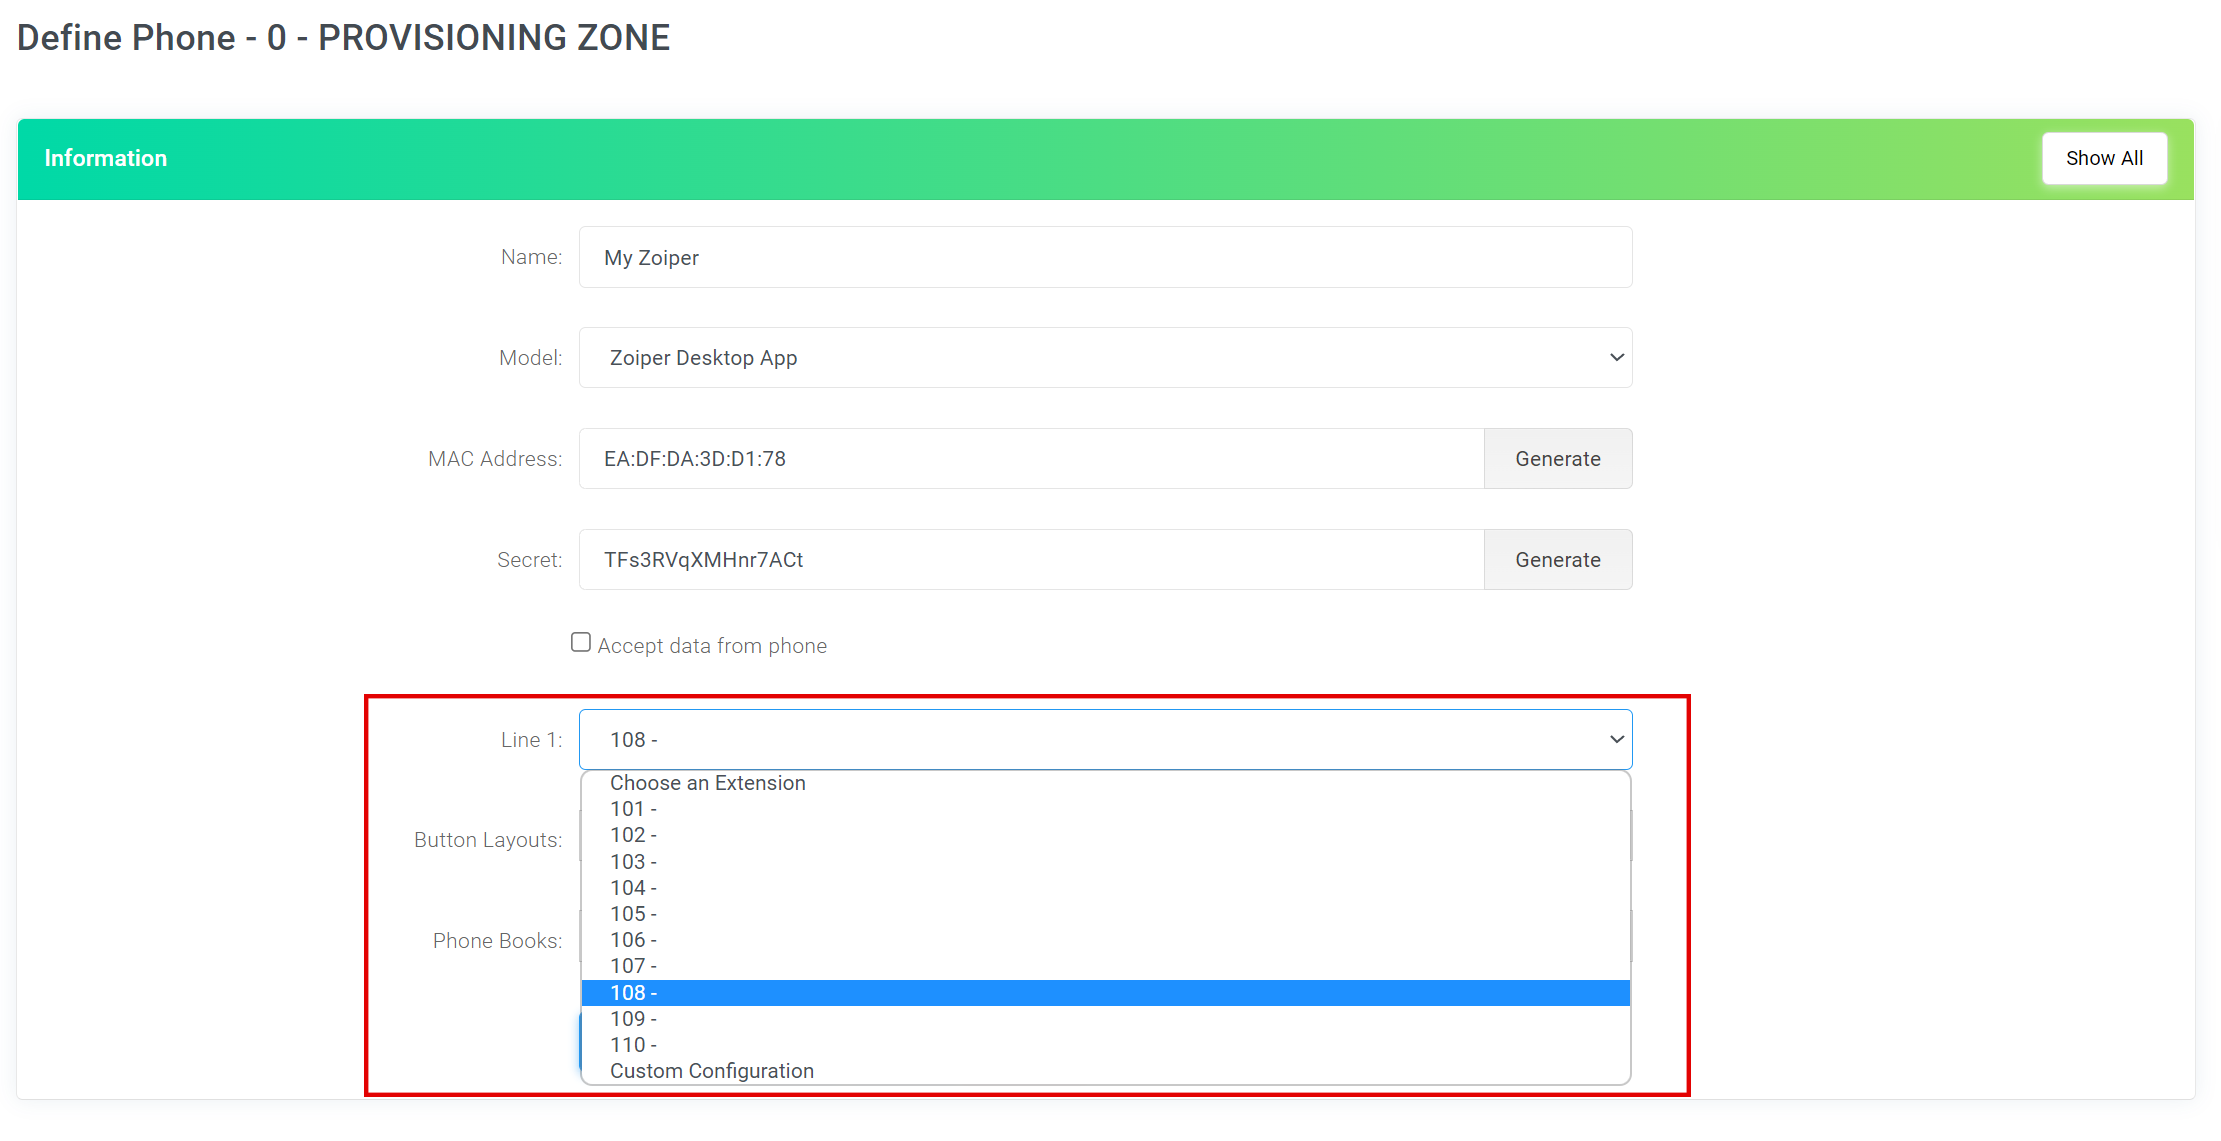
You can now Save your phone provisioning settings.
Step 5:
Now that you have successfully set up your Zoiper autoprovisioning link, you can simply click it within the 'Phones' data table to be automatically redirected to the unique Zoiper provisioning page.
Step 6:
When first landing on the Zoiper download and installation page, you will be asked which device operating system you are using for this installation, select the Operating system that is relevent to your device.
You can now proceed to the next half of this article.

Installation instructions
Instructions for installing and configuring Zoiper on your iPhone
Step 1
Download and install Zoiper |
Skip this step if you have Zoiper already installed on your device.
Download Zoiper with iTunes or download it directly from the App Store on your mobile device.
If not, please follow the provided screenshots .
|
| |
Step 2
Start Zoiper and scan the QR code |

Click on the Zoiper icon to start the application.
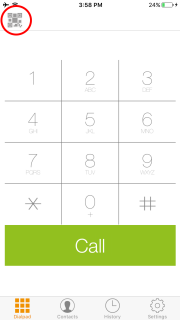
When the application is loaded, click on the top left button.
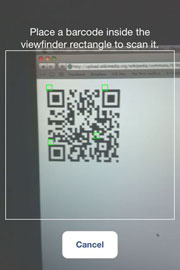
A viewfinder will appear, please position the phone so that the black and white barcode from step 3 fits between the lines.
|
Step 3
Scan your autoprovisioning QR code |
| |
Step 4
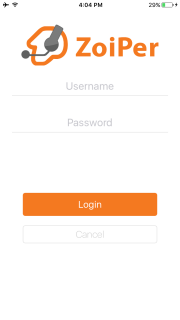
Provide a username and a password |
 |
|
|
Done
You can now use your Zoiper |
Congratulations! You're ready to use your Zoiper.
If you had any difficulties following the steps provided above, please feel free to contact our customer support. |
